CROSTOLI – BRINGING ITALIAN FAT TUESDAY TO TULIPLAND

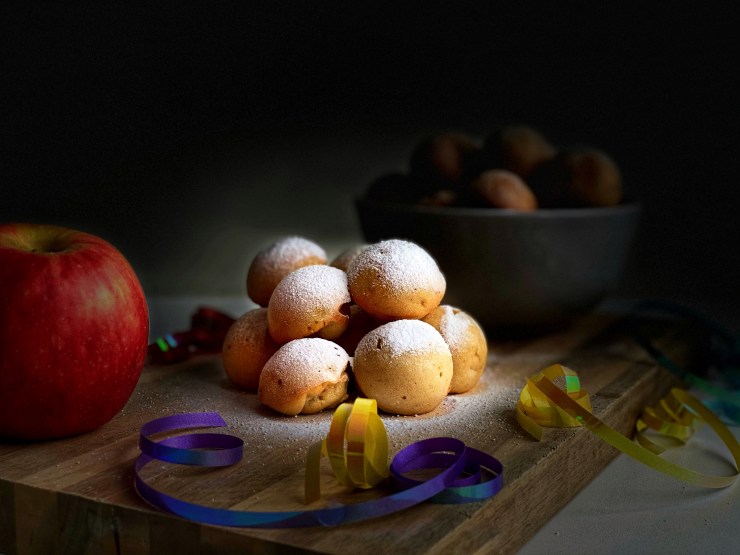
And it’s 12 years of Carnival bakes!
A very busy one this year, since my teaching period started yesterday. As one might imagine, there is a lot to do!
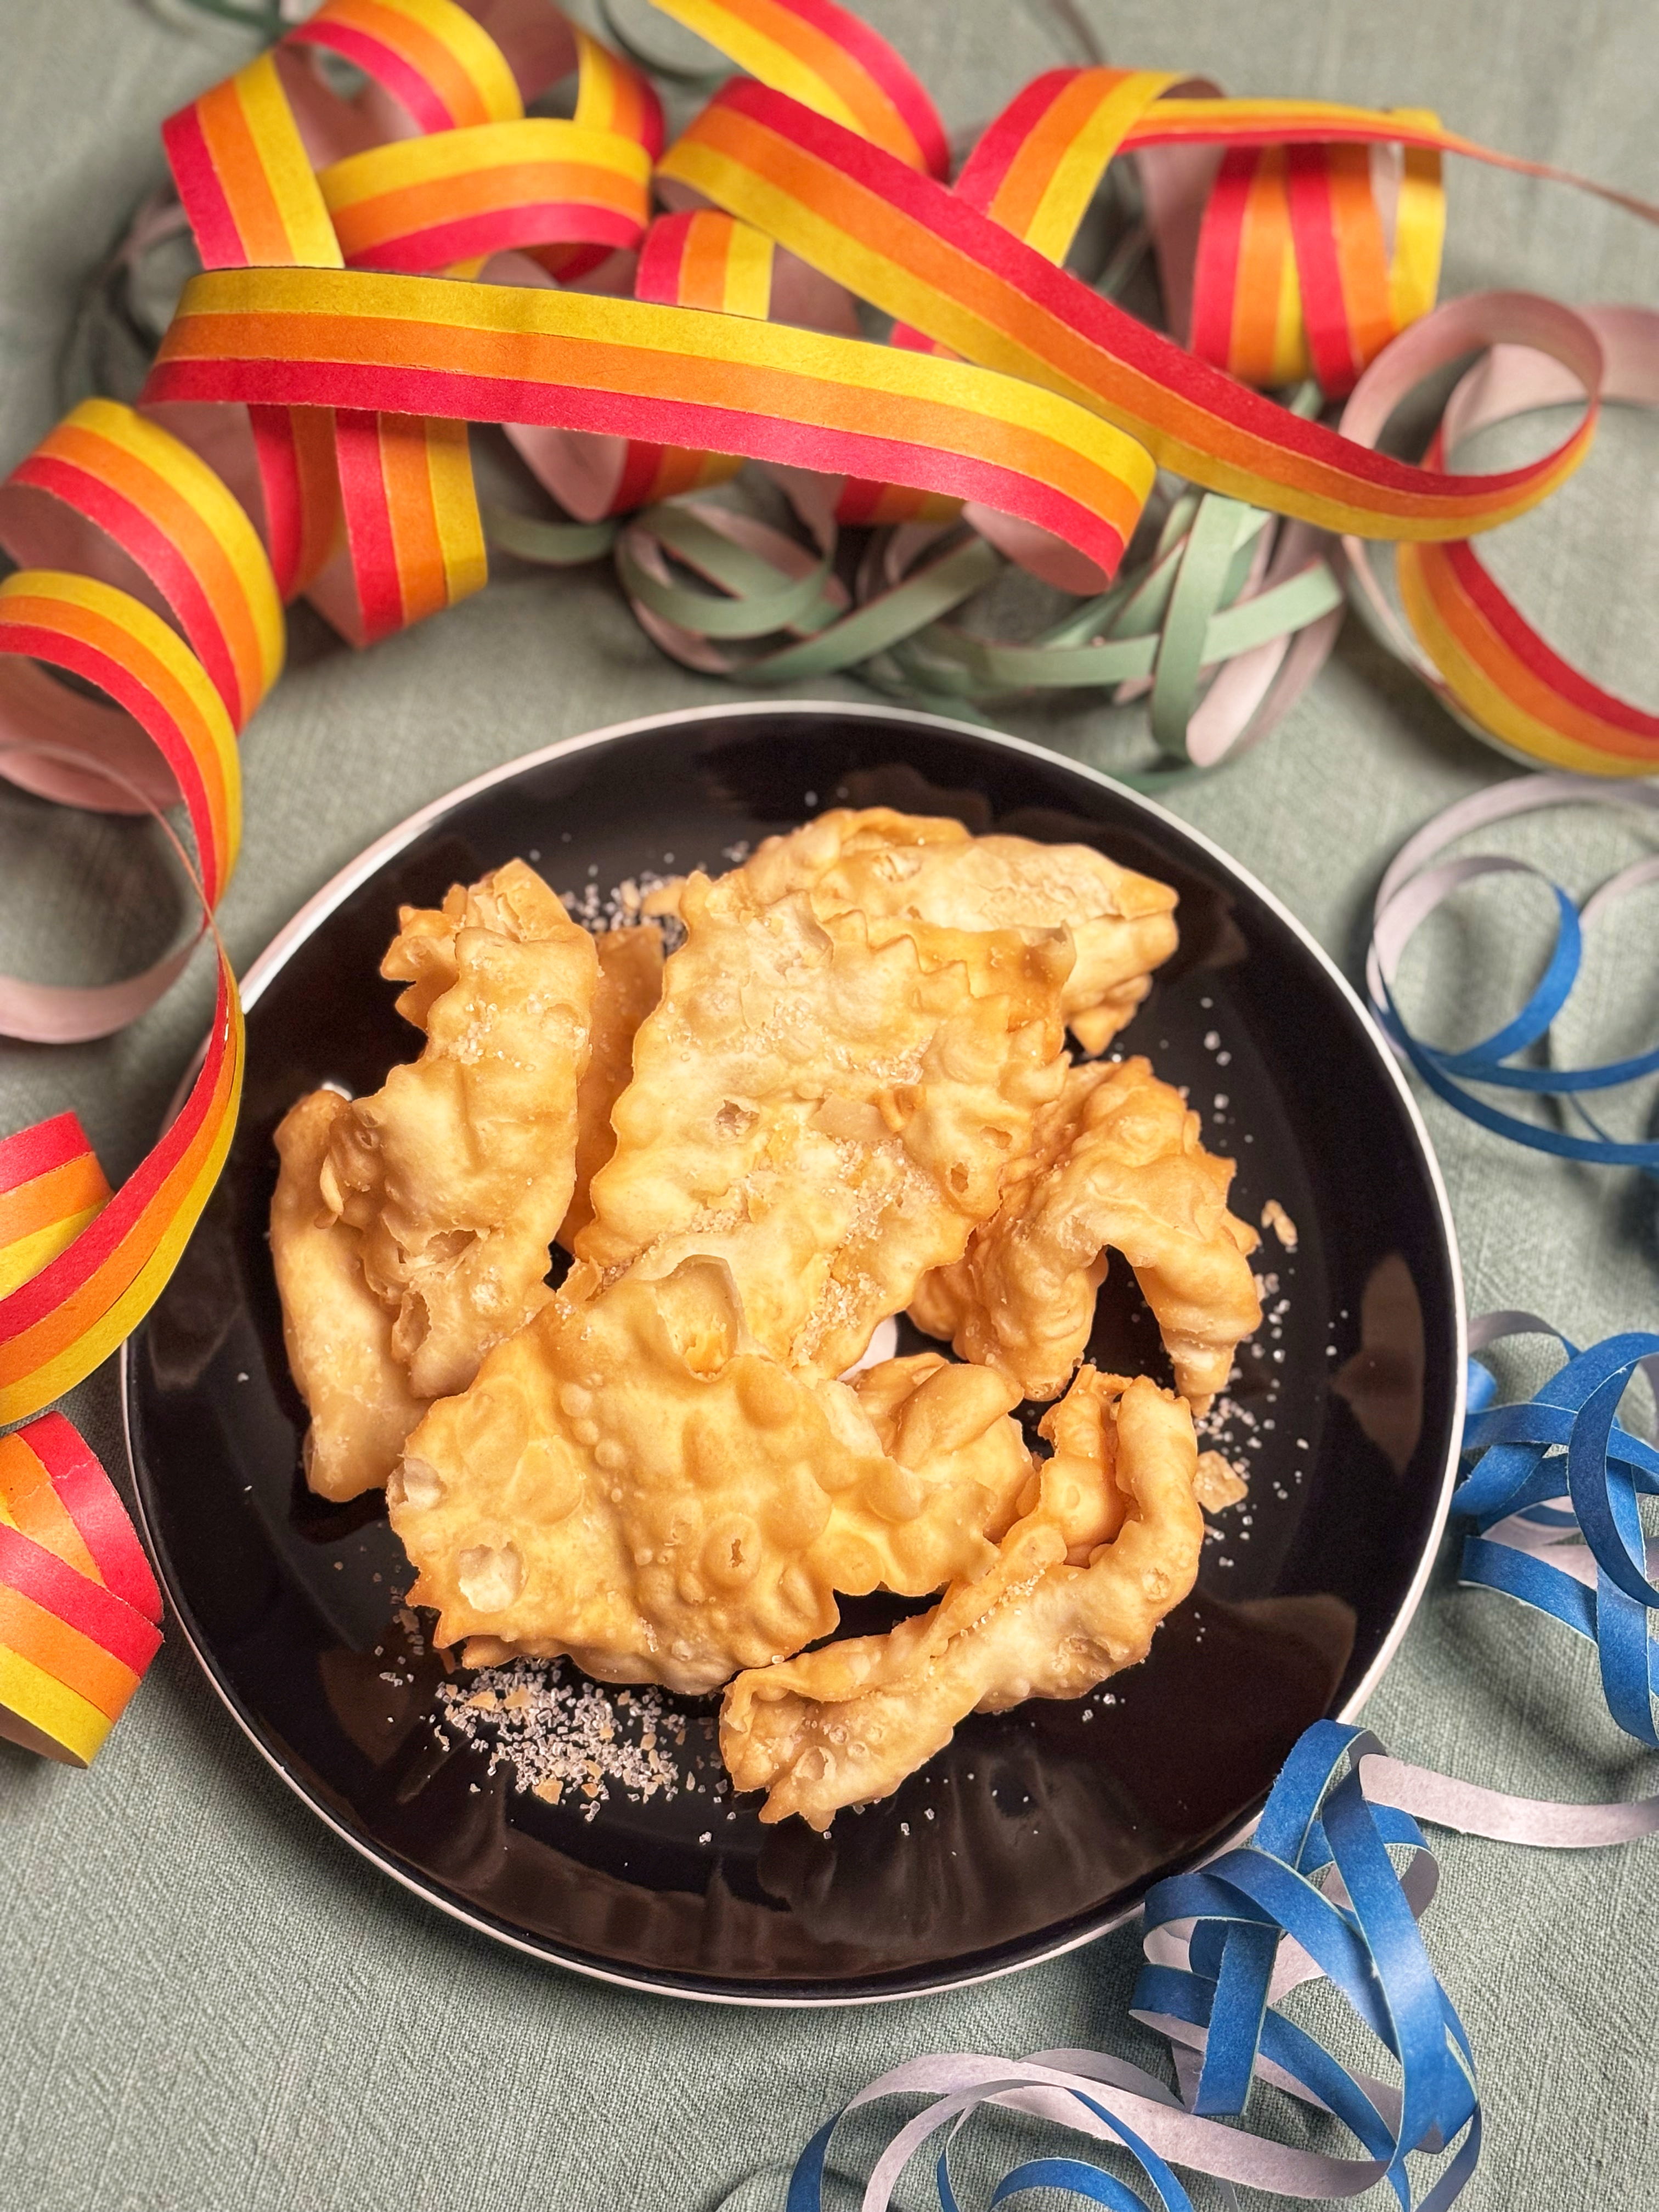
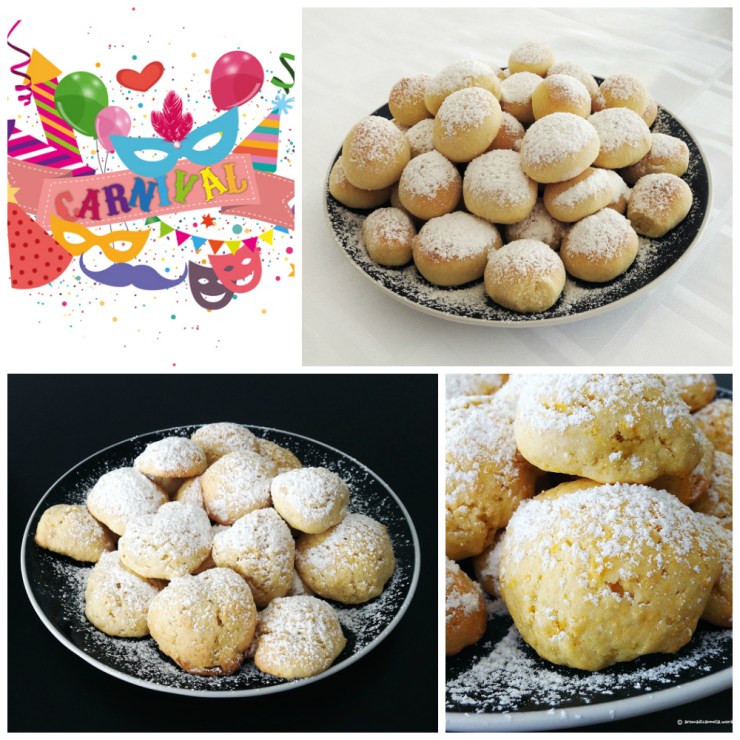
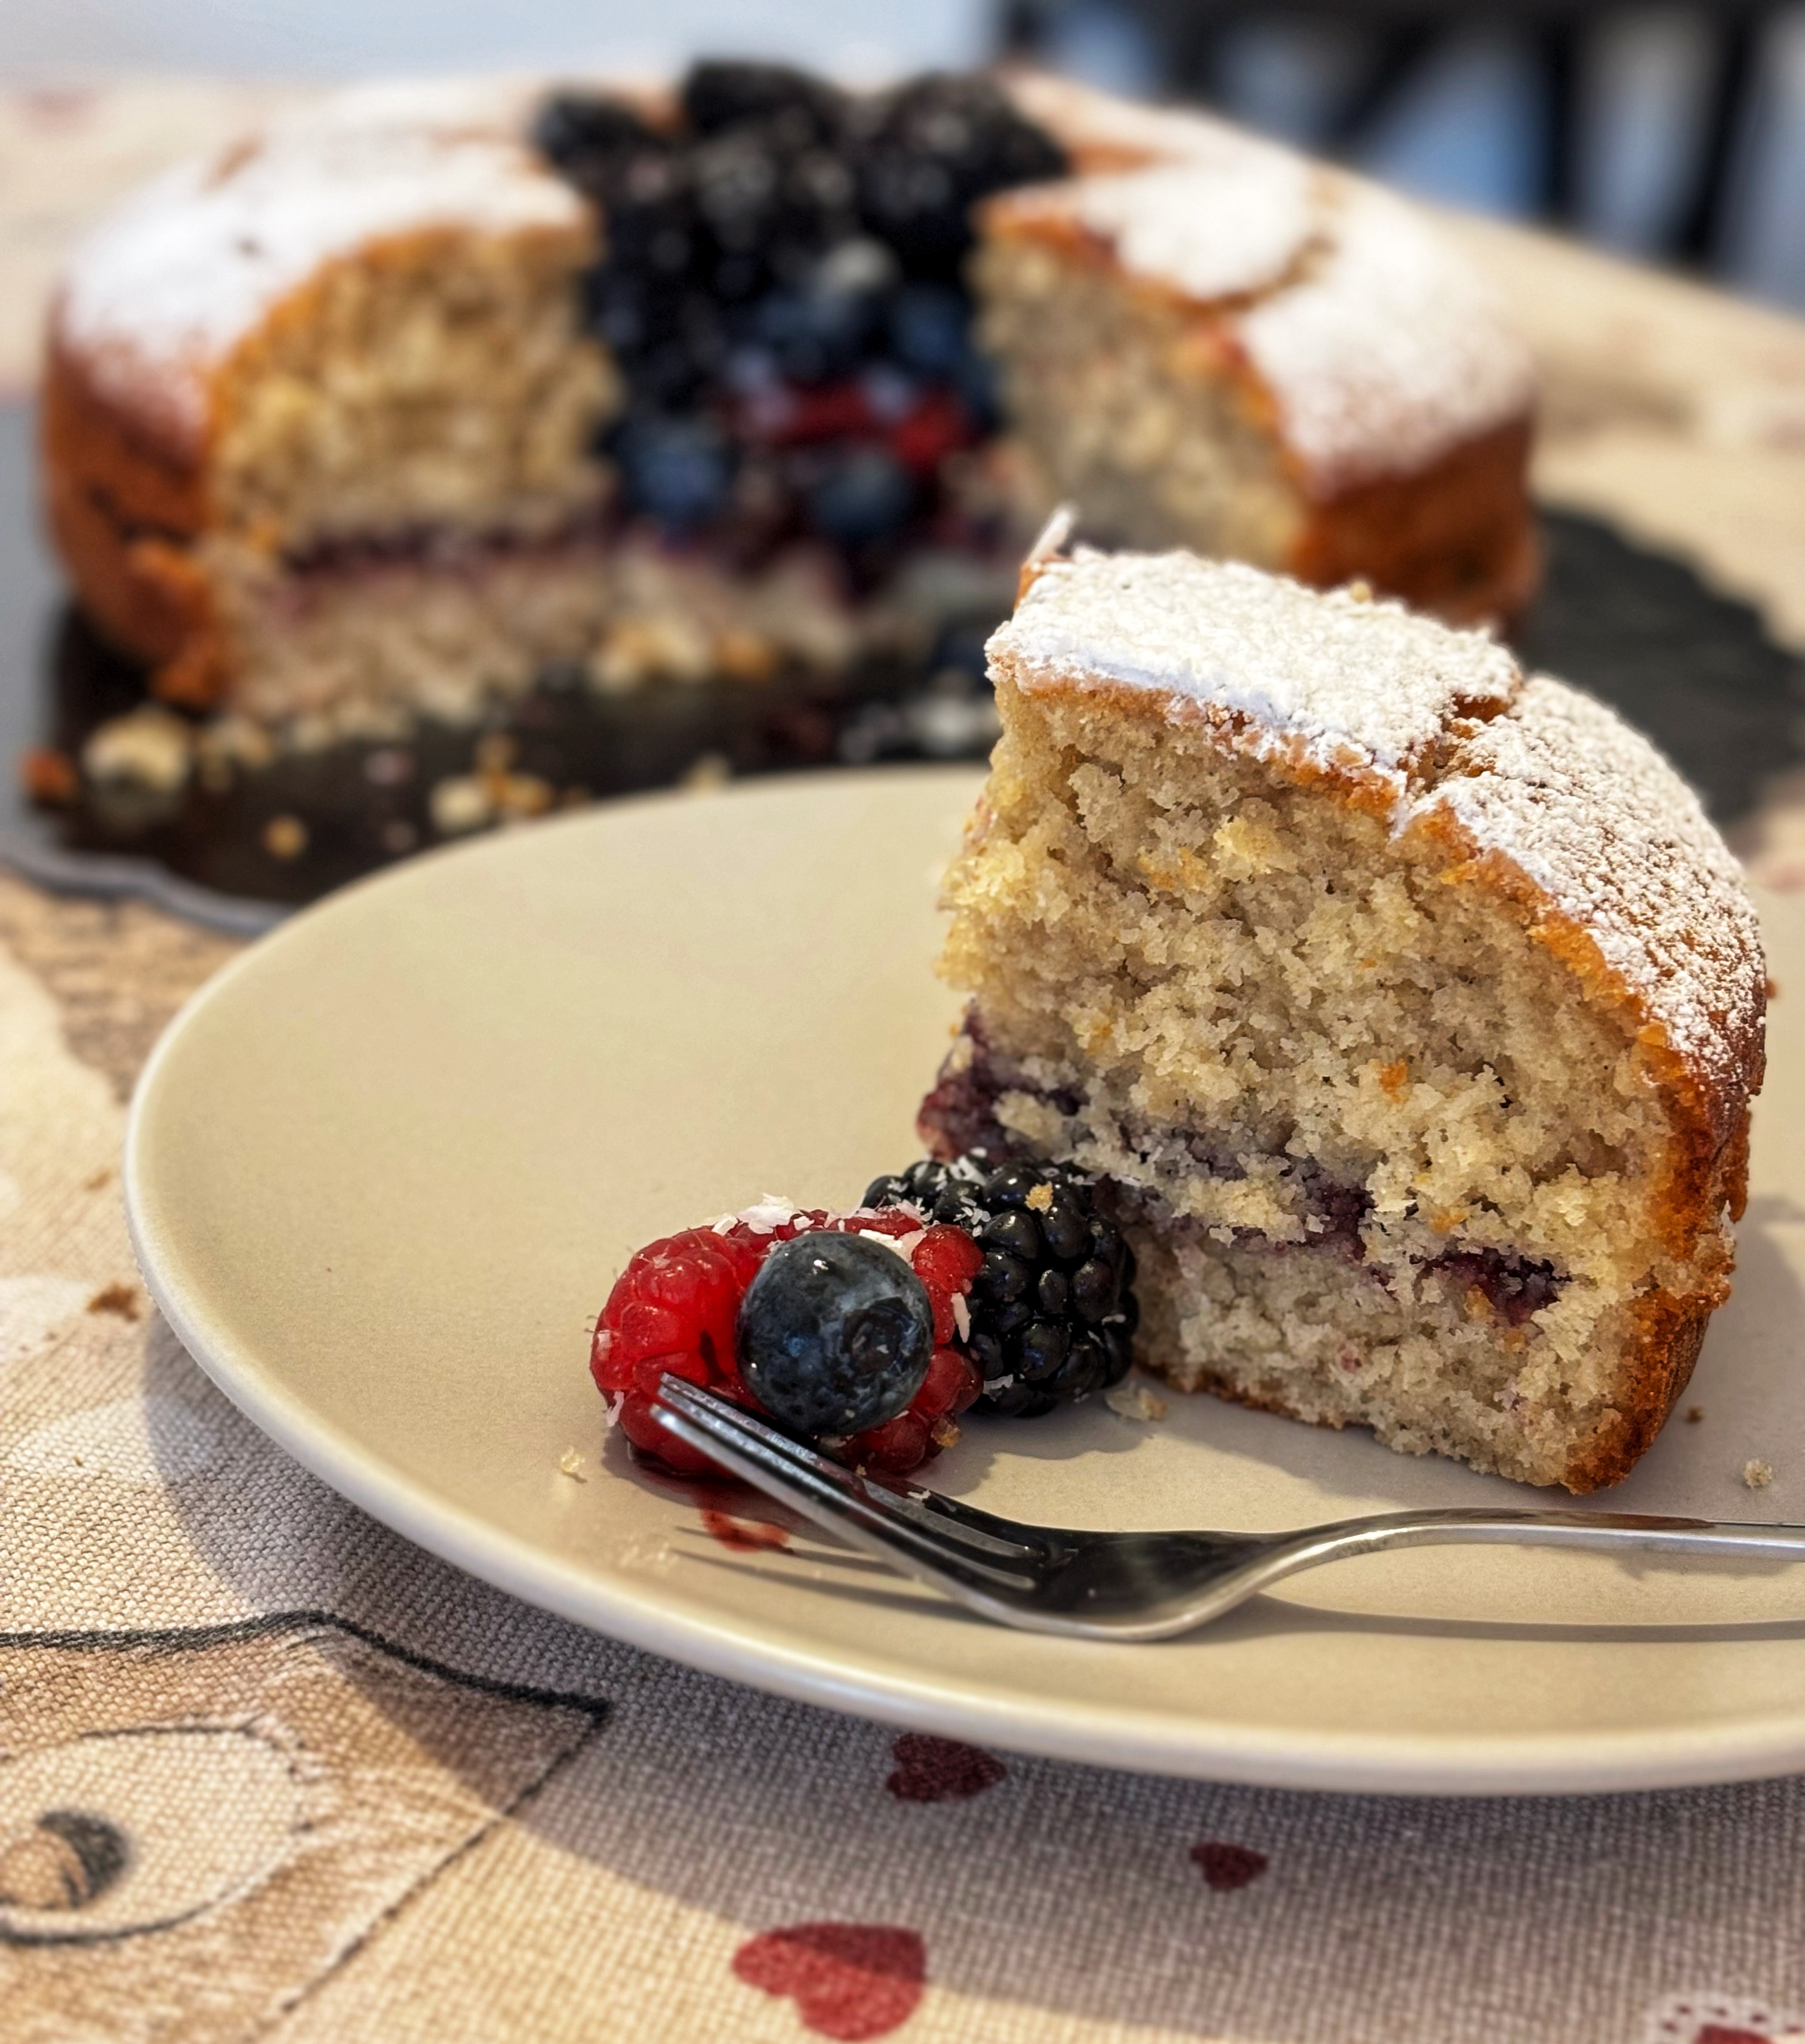
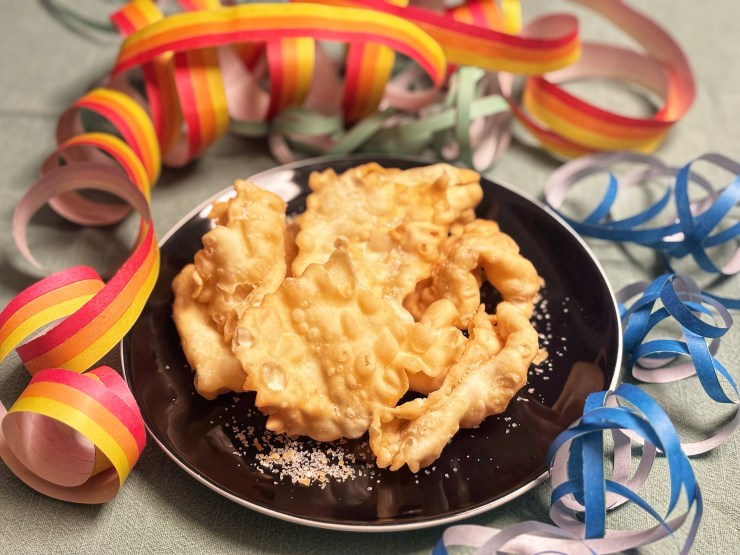
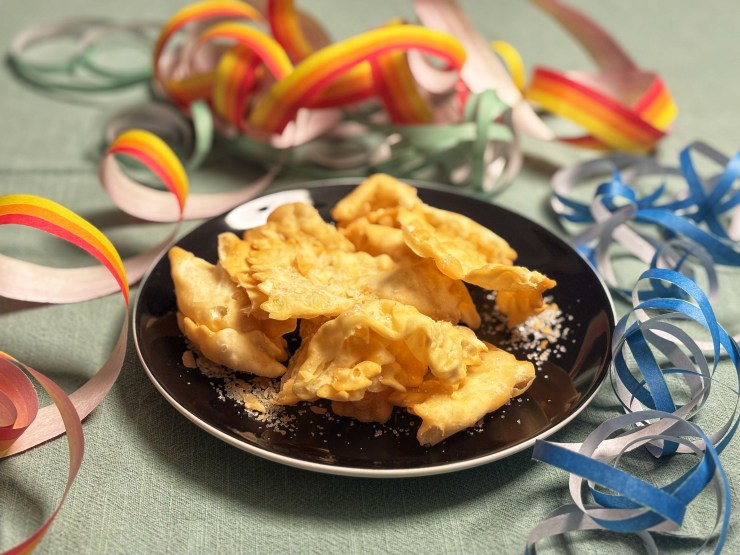
So not a very long #foodstory this year and not a very recent bake, yet I am happy to share this English version of my favorite Carnival fritters: the crostoli!
See below for the recipe in both fried and baked versions.

For the Italian version, click here.

CROSTOLI

Ingredients

For the dough

  • 600 g flour
  • 70 g sugar
  • 70 g melted butter
  • 3 eggs
  • ยฝ glass grappa
  • Lemon flavoring or grated lemon zest
  • 1 sachet baking powder

For the topping

  • 1 egg, beaten with a few drops of milk (for the baked version)
  • Plenty of crystal sugar or icing sugar for dusting

For frying option

  • About 1 l peanut oil or another neutral vegetable oil (e.g., sunflower, corn, rapeseed) for deep frying

Equipment (optional but helpful)

  • Stand mixer with dough hook
  • Pasta machine (or a rolling pin and some patience)
  • Pastry cutter

Procedure

Dough & shaping

  1. Put all the dough ingredients into the bowl of your stand mixer: make a well in the flour, then add the sugar, eggs, melted butter, grappa, lemon flavoring, and baking powder in the center.
  2. Start mixing on the lowest speed, then increase to lowโ€“medium until the dough is smooth, elastic, and comes away from the sides of the bowl. To the touch it should not be stick; if it is, add a little more flour.
  3. Now for the fun part: roll out the dough using a pasta machine or a rolling pin. Aim for a thin sheet (about 1โ€“2 mm). The thinner, the lighter and bubblier the crostoli will be.
  4. Use a pastry cutter to cut the dough into rectangles or diamonds and make a small slit in the middle of each piece.

Baked crostoli

  • Preheat the oven to 210ยฐC (static).
  • Place the crostoli on a baking tray lined with parchment paper. Brush the surface lightly with the beaten egg and milk.
  • Bake for 8โ€“10 minutes, until they are golden and puffed with little bubbles.
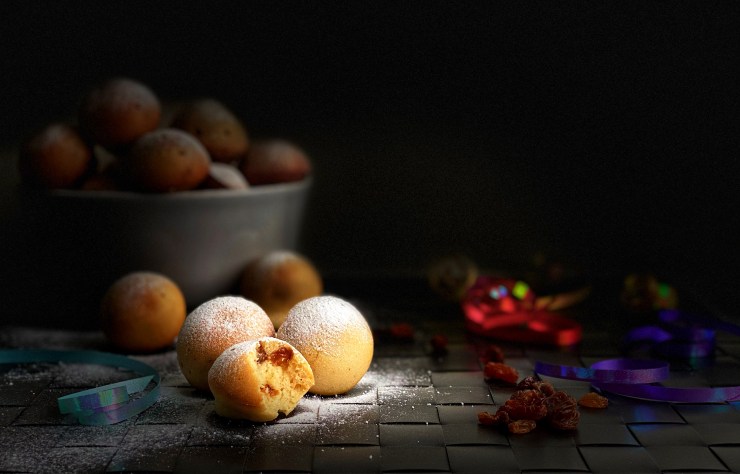
  • Let them cool slightly, then dust generously with icing sugar.

Fried crostoli (like in my photos)

  • Heat the oil in a wide pot to about 170ยฐC.
  • Fry a few crostoli at a time: slide them carefully into the hot oil and cook for a couple of minutes, turning them halfway through, until theyโ€™re just lightly golden and covered in bubbles.
  • Remove with a slotted spoon and place on kitchen paper to drain the excess oil.
  • Once theyโ€™re warm but not hot, dust very generously with icing sugar.

Down the memory lane:
Looking back at the past 12 years of Fat Tuesday FoodStories

PUMPKIN & RICOTTA CROSTATA

Buttery pasta frolla, silky pumpkinโ€“ricotta, a whisper of cinnamon. Cozy slice, coffee ready โ˜•

For the Italian recipe, click here.

InstaRecipe

Ingredients (24 cm)

For the classic pasta frolla:

  • 360 g all-purpose flour
  • 40 g corn starch (maรฏzena)
  • 40g sugar
  • 2 g fine salt (โ‰ˆ ยฝ tsp)
  • Zest of ยฝ lemon or 1 tsp vanilla sugar/extract (aroma)
  • 170 g cold unsalted butter, cubed
  • 1 large egg (cold)

For the filling

  • 80 g cinnamon tea biscuits (or use a little granulated sugar + ground cinnamon as a substitute)
  • 250 g raw pumpkin (peeled & cubed), steamed until tender, then mashed into purรฉe
  • 65 g sugar
  • 2 eggs
  • 100 g ricotta
  • Pumpkin seeds, to taste
  • Ground cinnamon, to taste

Procedure

Frolla

  1. Whisk flour, cornstarch, sugar, salt, zest/vanilla.
  2. Rub in cold butter to sandy crumbs.
  3. Add egg; mix just to combine (add 1โ€“2 tsp cold milk if dry).
  4. Flatten, wrap, chill 30โ€“45 min.

Filling 

  1. Whisk pumpkin purรฉe, sugar, eggs, ricotta, pinch cinnamon until smooth.
  2. Toast pumpkin seeds in a dry pan.

Assemble & bake

  1. Grease a 24 cm tin. Roll out 2/3 frolla; line base + sides.
  2. Crush biscuits; spread over base.
  3. Pour filling, sprinkle toasted seeds.
  4. Lattice with remaining frolla.
  5. Bake static 180ยฐC / 355ยฐF, 50 min.
  6. Cool completely. 

Slice & enjoy!

BERRY & GELATO CAKE

With the help of my lilโ€™ nephew and my Nederlander, I made this berry & gelato cake for my dadโ€™s birthday! It also turned out perfect for a hot Italian summer dayย ๐Ÿ™‚

InstaRecipe

Ingredients

For a 30×10 cm tin:

โ€ข 500 g berry gelato
โ€ข 500 g cream gelato
โ€ข 5 tbsp berry jam + 2 tbsp water
โ€ข 125 g cookies (Digestive/Gran Cereale/Petit)
โ€ข 80 g butter
โ€ข Fresh berries to decorate

Procedure

1. Line tin with baking paper.
2. Soften berry gelato, whip, spread in tin โ†’ freeze 2 hrs.
3. Add jam layer โ†’ freeze 1 hr.
4. Crush cookies, mix with melted butter.
5. Soften cream gelato, whip, spread over the cake jam layer.
6. Top with cookie mix, press down.
7. Freeze 5โ€“6 hrs (or overnight).
8. Remove from the tin by flipping upside down onto a serving plate, peel off the paper, let rest a few minutes, then decorate with fresh berries.

COLOMBA ALL’ARANCIA & LIMONE


One more surprise before Easterโ€ฆ A soft, fragrant Colomba filled with silky orange-lemon cream and topped with a zesty orange glaze ๐ŸŠ๐Ÿ‹๐Ÿ•Š๏ธ
Perfect for your Easter table!

InstaRecipe

Ingredients

For the colomba (dove-shape 750 gr or a baking tin of 20cm diameter)

  • 300 gr flour “00” type
  • 3 eggs
  • 90 gr sunflower oil
  • 170 gr (lactose-free for me) milk
  • 150 gr browns sugar
  • 1 lemon zest
  • 1 orange zest
  • 15 gr baking powder

For the orange-lemon curd

  • 50ml lemon juice
  • 50ml orange juice
  • 40g sugar
  • 20g flour

For the  orange glaze

  • 10โ€“11 tsp orange juice
  • 125g powdered sugar

Procedure

  1. Separate the egg whites from the yolks.
  2. Whisk yolks with sugar + zests. Add oil, milk, flour, and baking powder.
  3. Beat egg whites until fluffy, fold gently into the batter. Pour into your baking tin.
  4. Bake at 180ยฐC (356ยฐF) for ~40 min (cover with foil if it browns too fast). Let cool.
  5. For the cream: Mix citrus juices, sugar, and flour in a small saucepan. Cook over low heat, stirring, until thick and smooth. Let it cool a bit.
  6. Once the cake is cool, poke holes with the bottom of a wooden spoon and fill with the citrus cream using a sac-ร -poche.
  7. For the glaze: mix powdered sugar with orange juice gradually until smooth. I used about 4 tbsp for a light, thin glaze โ€” if you prefer a thicker layer with a bit of crust, use just 2โ€“3 tbsp instead. Spoon over the Colomba and let it set.

BIGNรˆ (CHOUX) NESTS WITH PISTACHIO CREAM

Fluffy choux nests filled with silky pistachio cream, topped with a white chocolate egg and a dusting of powdered sugar ๐Ÿ˜ Perfect for your Easter table! ๐Ÿ’š๐Ÿฃ

InstaRecipe

Ingredients

For the bignรจ (choux) nests (makes about 8 nests of about 6cm diameter):

    • 125 g all-purpose flour (or Italian โ€œ00โ€ flour)
    • 125 g water
    • 80 g unsalted butter
    • 3 medium eggs
    • 2 g salt

    For the pistachio cream:

    • 250 ml milk
    • 2 egg yolks
    • 25 g sugar
    • 15 g cornstarch (or all-purpose flour/00 flour)
    • 50 g pistachio cream

    For decoration:

    • Powdered sugar
    • Chocolate eggs (I used white chocolate eggs filled with pistachio cream)

    Prepare the Choux Pastry

    In a small saucepan, add the water, butter (cut into pieces), and salt. Place over medium heat, stir, and wait until the butter melts completely.
    Once the mixture starts to boil and bubbles form on the surface, add the flour all at once. Stir immediately using a wooden spoon. Remove the saucepan from the heat and continue stirring for a few seconds to help the dough absorb all the flour. It will quickly form a compact, elastic dough that pulls away from the sides of the pan. Return the pan to medium heat and continue stirring for another 30โ€“60 seconds, until you hear a slight scraping sound from the bottom. This step helps dry out the dough slightly. Transfer the dough to a work surface or mixing bowl and let it cool slightly, working it with a spatula to bring down the temperature.


    Pipe and Bake the Nests

    Transfer the choux dough into a piping bag fitted with a star tip (I used a 10 mm one). On a baking sheet lined with parchment paper, pipe the nests. Each should be about 6 cm in diameter. Pipe two rings per nest: the second ring should go slightly inward, creating a nest shape without fully closing the center.
    Bake in a static oven at 200ยฐC (390ยฐF) for the first 10 minutes. Without opening the oven, reduce the temperature to 180ยฐC (355ยฐF) and continue baking for 25โ€“30 minutes. If condensation forms in the oven during the last 5 minutes, insert a wooden spoon in the door to keep it slightly open and allow the steam to escape.
    When done, turn off the oven and leave the nests inside with the door slightly ajar for about 10 minutes to cool gradually and dry out completely.


    Prepare the pistachio pastry cream

    While the nests are baking, prepare the pistachio pastry cream following the method I shared here.


    Filling the nests and decorate

    Once the nests are fully cooled, cut each one in half horizontally. Fill the bottom half with pistachio pastry cream using a piping bag. Close with the top half and pipe a swirl of pistachio cream on top.
    Place a chocolate egg in the center of each nest and finish with a dusting of powdered sugar.

    Enjoy!

    COMPLEANNO ITALIANO 3.0

    It’s another year around the sun, and again, like in the past two years, I get to celebrate it back in Bel Paese.

    As I was sharing a couple of years ago, I haven’t had the chance to travel back home for my birthday for a long time. Back in 2023, I finally had the opportunity not only to celebrate my compleanno italiano but also the birth of a new family member, my little nephew, with whom now I share the birthdate – I am such a proud auntie! Since then, it has become a bit of a tradition to travel to Italy around this time to celebrate together.

    So here I am, celebrating another wonderful compleanno italiano (version 3.0) on a lovely sunny day in the Venetian coast (if you wonder what happened to compleanno italiano 2.0, let’s just say that I spent it super sick, sharing a nice bronchitis with my nephew – but we still got to celebrate our bdays later!).

    While feeling well this year, I couldn’t miss the opportunity to bake something as per tradition – this time by experimenting with flours and flavours. After all, getting older doesnโ€™t mean giving up on feeling young (especially when it comes to baking adventures). And in the spirit of continuing my tradition of giving cakes iconic names, say hello to Torta 35 โ€” proudly joining the ranks of 33, 30, and 25. Itโ€™s been ten years since Torta 25, my first more elaborate and good-looking birthday bake. Time flies when you are baking fun!

    Torta 35 is a coconut-flavored rustic cake with blackberry jam and fresh berries.

    TORTA 35 (Coconut rustic cake with blackberry jam)

    Ingredients

    For the batter (for a cake tin 22 cm diameter):

    • 240 gr type 2 flour
    • 4 eggs
    • 195 ml vegetable oil (I used sunflower oil)
    • 195 ml milk
    • 180 g shredded coconut
    • 16 gr baking powder
    • 170 g sugar
    • blackberry jam for filling (other berry jams, like raspberries and blueberries can also fit)

    For the topping:

    • fresh blackberries (around 150 gr, also possible to mix with raspberries and blueberries, like I did)
    • 1 tsp shredded coconut
    • powdered sugar

    Prepare the batter

    Crack the eggs into a bowl, add the sugar and mix well to obtain a smooth mixture. Add the oil and milk, and continue mixing. Next, add the sifted flour and baking powder and mix everything together until smooth. Then, add the shredded coconut. Pour the mixture into a round mold of about 22 cm in diameter, either buttered or lined with parchment paper.


    Bake the cake

    Bake in a preheated (static) oven at 180ยฐC (356ยฐF) for 45/50 minutes. Before removing from the oven, test with a toothpick to ensure itโ€™s done.


    Fill in the cake

    Once the cake has completely cooled, carefully cut it in half horizontally. Spread a generous layer of blackberry jam over the bottom half, then gently place the top half back on.
    For a creative touch, you can optionally cut out a small disk from the center of the top layer to create a space for a little โ€œfruit basket.โ€


    Decorate the cake

    Arrange fresh blackberries (and/or other berries) on top of the cake โ€” either scattered across the surface or nestled in the center basket area. Dust the entire cake with powdered sugar, then finish by sprinkling a bit of shredded coconut over the blackberries.


    Bday bakes over the years